Install Validation
Although every decompiler has a slightly different implementation for BinSync, the instructions below should work almost the same for all decompilers. This is because we use a unified GUI made to work in a variety of QT versions.
In this tutorial, you will validate your BinSync install can:
- Use Git to connect to a BinSync project
- Read data from the remote BinSync project
- Set the read data into your decompiler
For this tutorial, we will use the example.bsproj repo that is a part of the BinSync project.
Sync Validation
Clone the example BinSync project.
git clone https://github.com/binsync/example.bsproj.git
Copy the fauxware binary out of the data branch for testing.
cd example.bsproj && git checkout data && cp fauxware ../
Open the fauxware binary in your decompiler. Make sure to save decompiler artifacts (.bnpr, .ida files, etc.) outside the BinSync repo. Verify BinSync has loaded in the decompiler’s terminal or log window:
[BinSync] X.X.X loaded
Or check your plugin menu. For example, if you are using IDA, you should see this option:
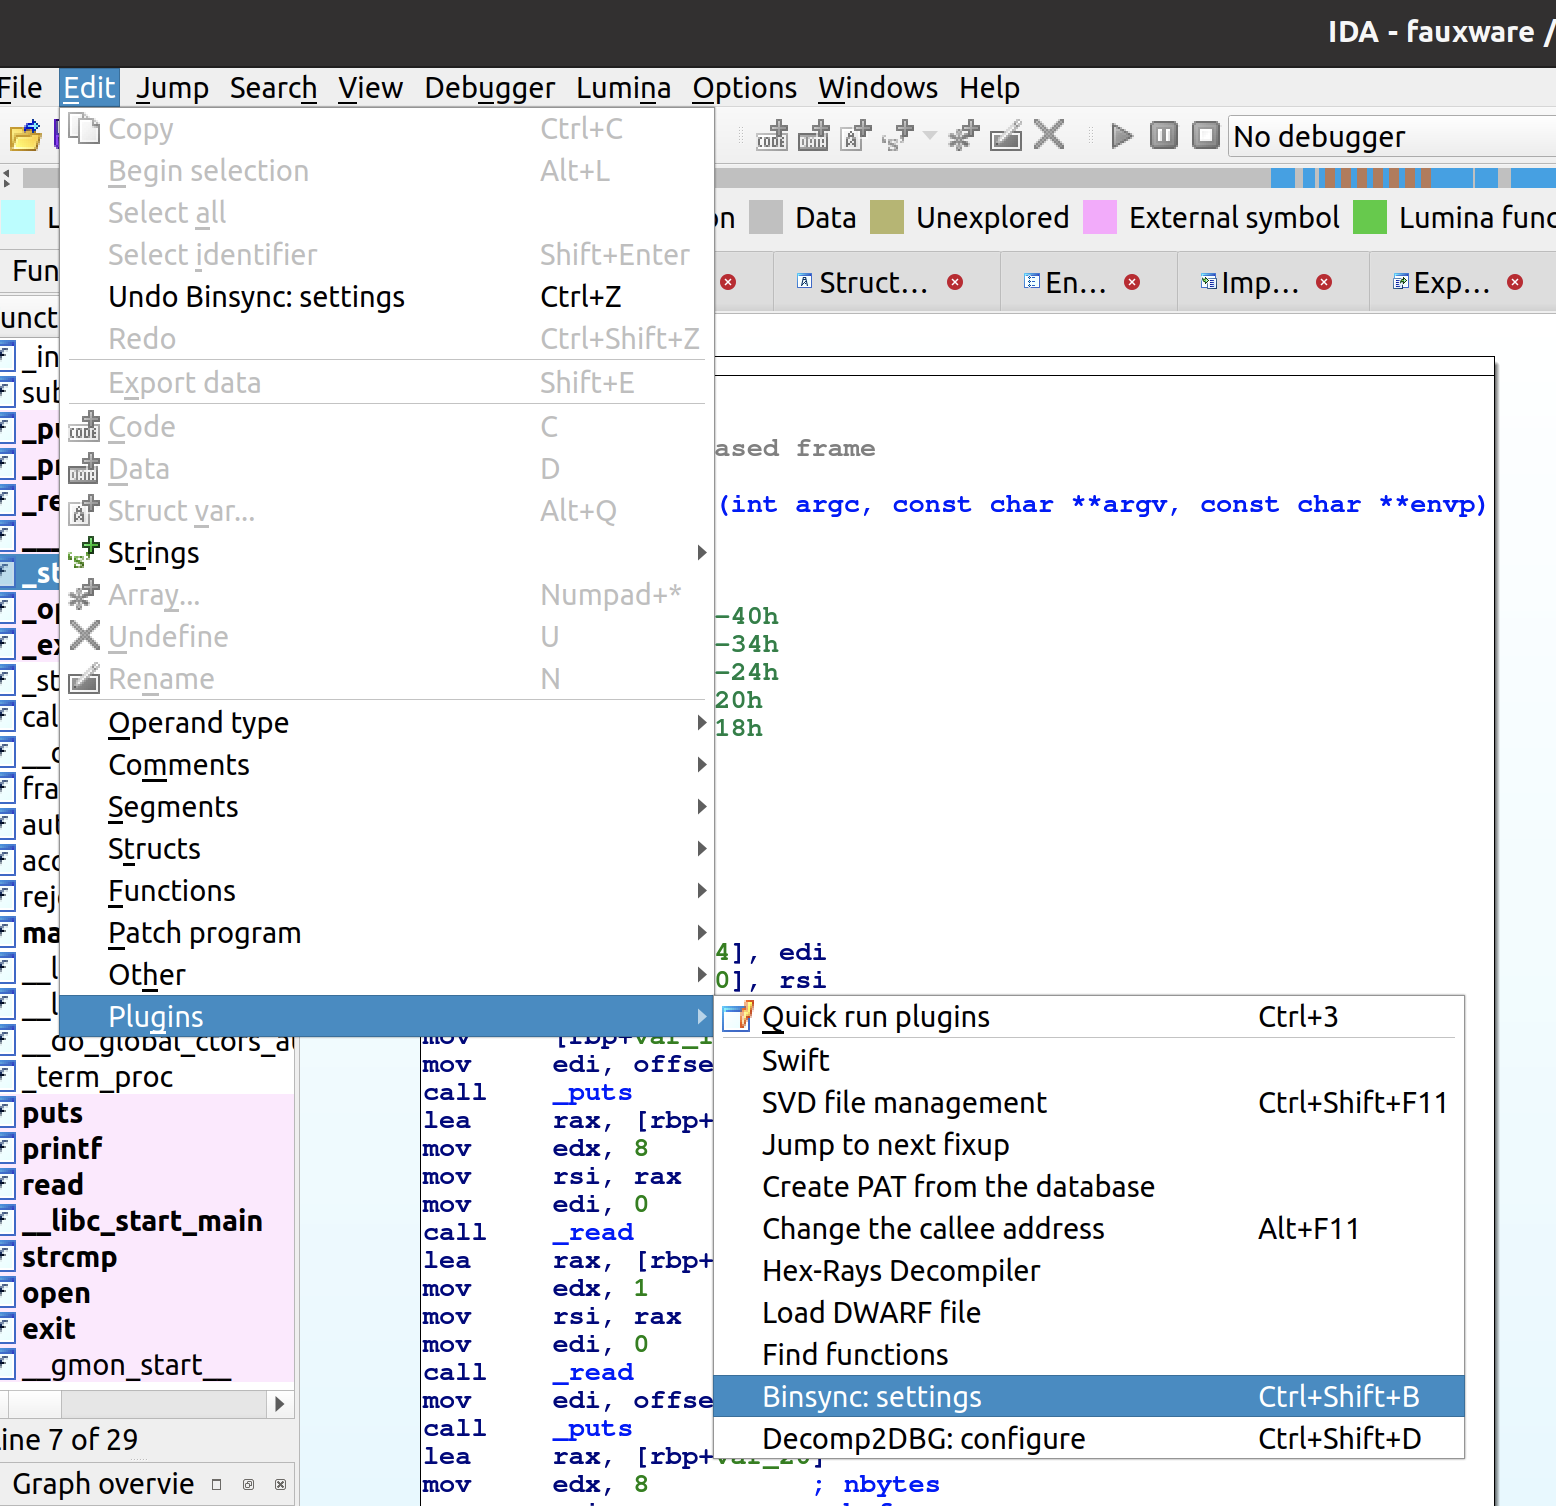
If neither show, the plugin isn’t running. Open the BinSync Config Pane and click the Open button
- You can hit
Ctrl+Shift+BorCtrl+Alt+Shift+Bto open it, OR - You can click your decompiler menu:
Edit -> Plugins -> Binsync: Configure.... On Binja it’s underPlugins. On Ghidra underTools - If neither option worked, make sure BinSync was installed correctly and/or is in your decompiler’s plugins folder
Then enter a username and set the project path to the location of example.bsproj:
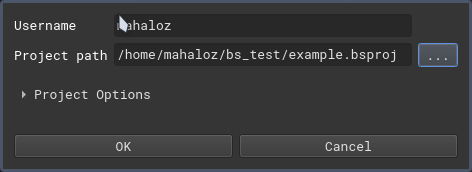
(If you are running these instructions on a computer without internet, you may want to open the project settings group and select Disable auto-push to remote.)
Verify your terminal or log says (with your username):
[BinSync]: Client has connected to sync repo with user: <username>.
If you are on angr-management or Ghidra this may be hidden. Instead, you should see a panel open with your username on the bottom right. If on Binary Ninja, open the log panel and make sure your log scope includes the Plugin Manager.
You should now see an Info Panel. Click on Activity, you can see other users’ activities. You should also notice your username on the bottom right of the panel to be green or yellow (depending on whether you have permission to push to the test repo’s remote):
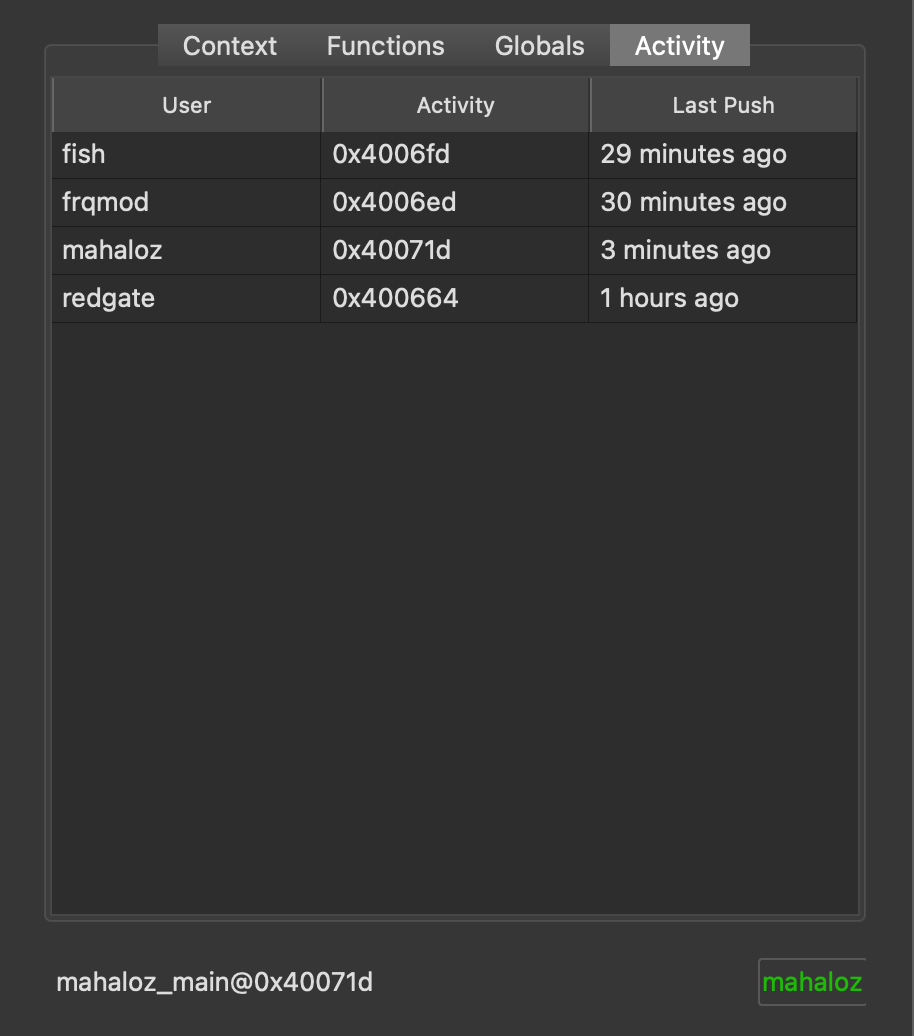
Congrats, your BinSync seems to connect to a repo, and recognize you as a user. Let’s test pulling to verify you can actually do stuff with your install.
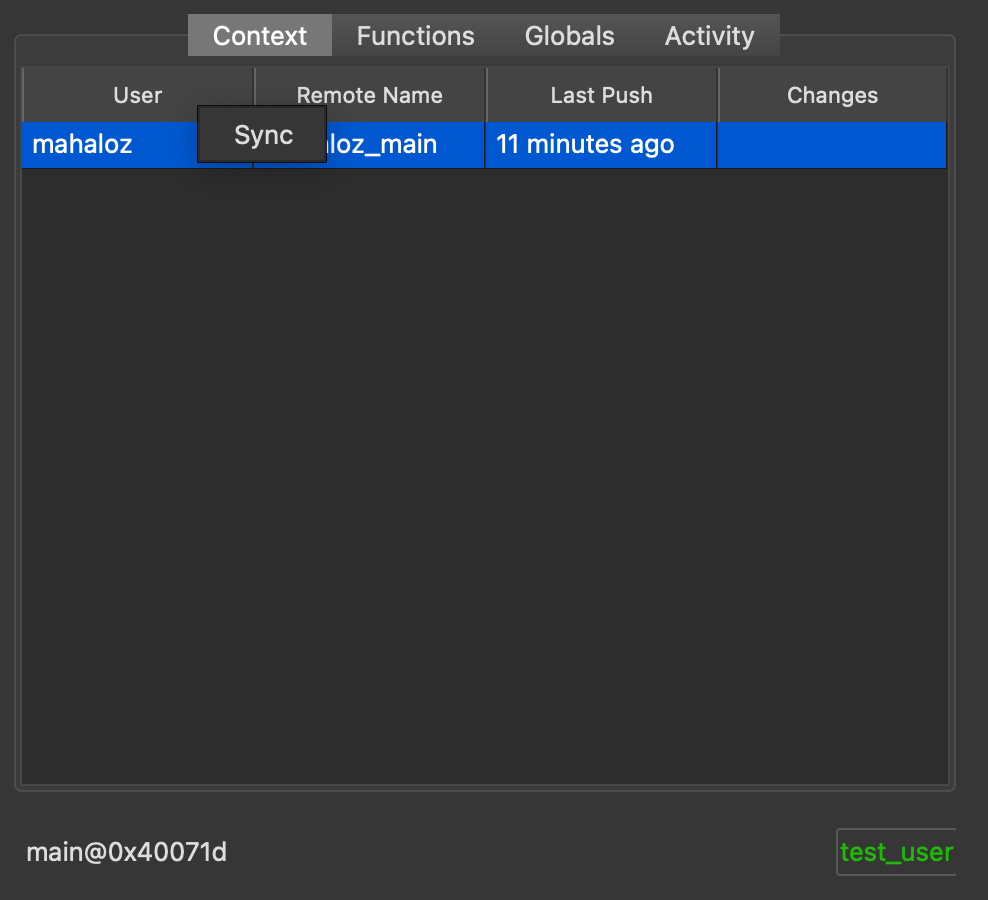
In your decompiler, click anywhere in the function main once. After a second or two you should notice on the Info Panel that the words on the bottom left say main@0x40071d. This is your context.
Now click on the Context tab, and right click on the user mahaloz. Click the Sync popup.
If everything works out, your decompilation should’ve changed for main. Now the function should be named
mahaloz_main, and it should look something like:
// ***
// This is a large comment in the header of
// the function! Thanks for using BinSync
//
// - <3 mahaloz
// ***
char __cdecl mahaloz_main(int my_arg1, const char **my_arg2, int **my_arg3)
{
  int v4; // [rsp+1Ch] [rbp-24h] BYREF
  mahaloz_struct special_var; // [rsp+20h] [rbp-20h] BYREF
  char buf[16]; // [rsp+30h] [rbp-10h] BYREF

  buf[8] = 0;
  LOBYTE(special_var.s3) = 0;
  puts("Username: ");
  read(0, buf, 8uLL);                           // the username is likley read here
  read(0, &v4, 1uLL);
  puts("Password: ");
  read(0, &special_var, 8uLL);
  read(0, &v4, 1uLL);
  v4 = authenticate(buf, &special_var);
  if ( !v4 )
    rejected(buf);
  return sub_4006ED(buf);
}
Take note of the variable names & types, and the comments. This will look different per decompiler, but the symbols and types should line up for the most part.
For more general use, tips, and advice, see our Use Guide.